In This Chapter
- Visits
- Entering Data into Visit Forms
Visits
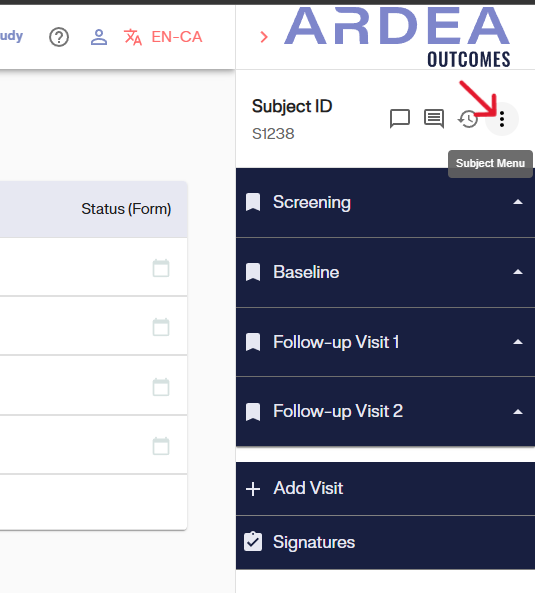
Study visits in GoalNav can be accessed through the study menu on the right side of the subject details page.
Screening Visit:
To access the Screening Visit page, click on the visit labeled “Screening.”
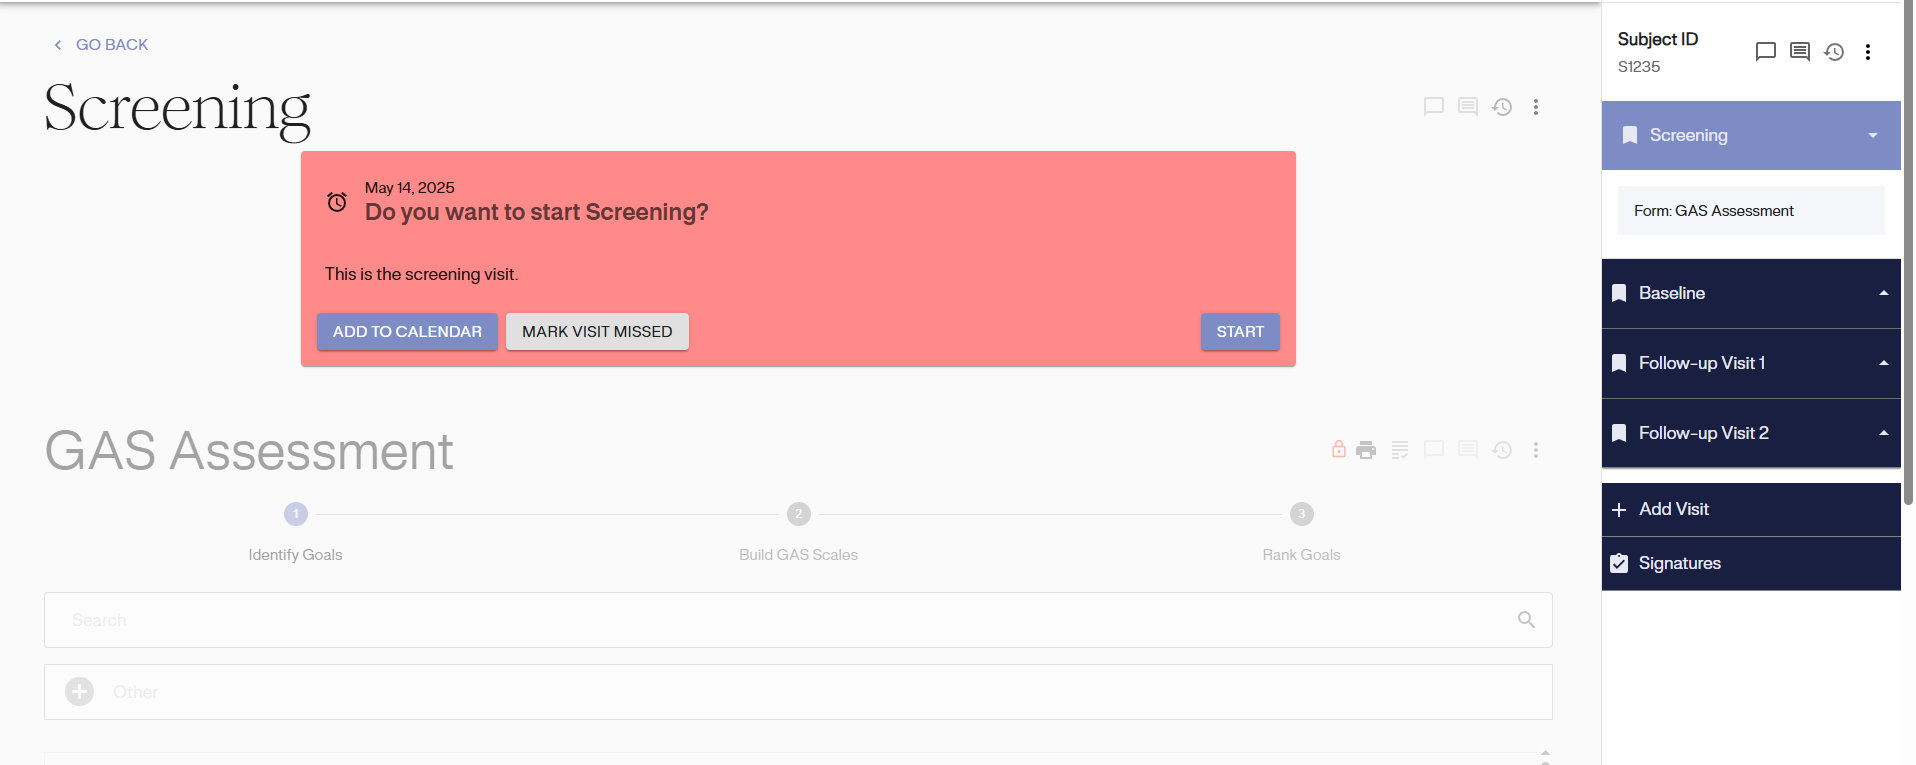
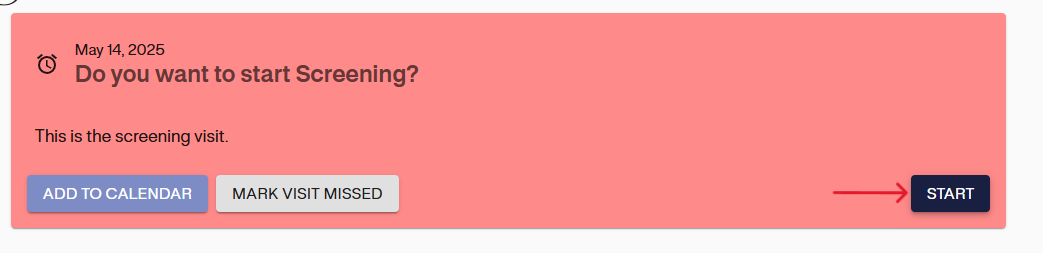
To start the Screening visit, click on the start button on the visit details page.
Baseline Visit:
To access the Baseline Visit page, click on the visit labeled “Baseline.”
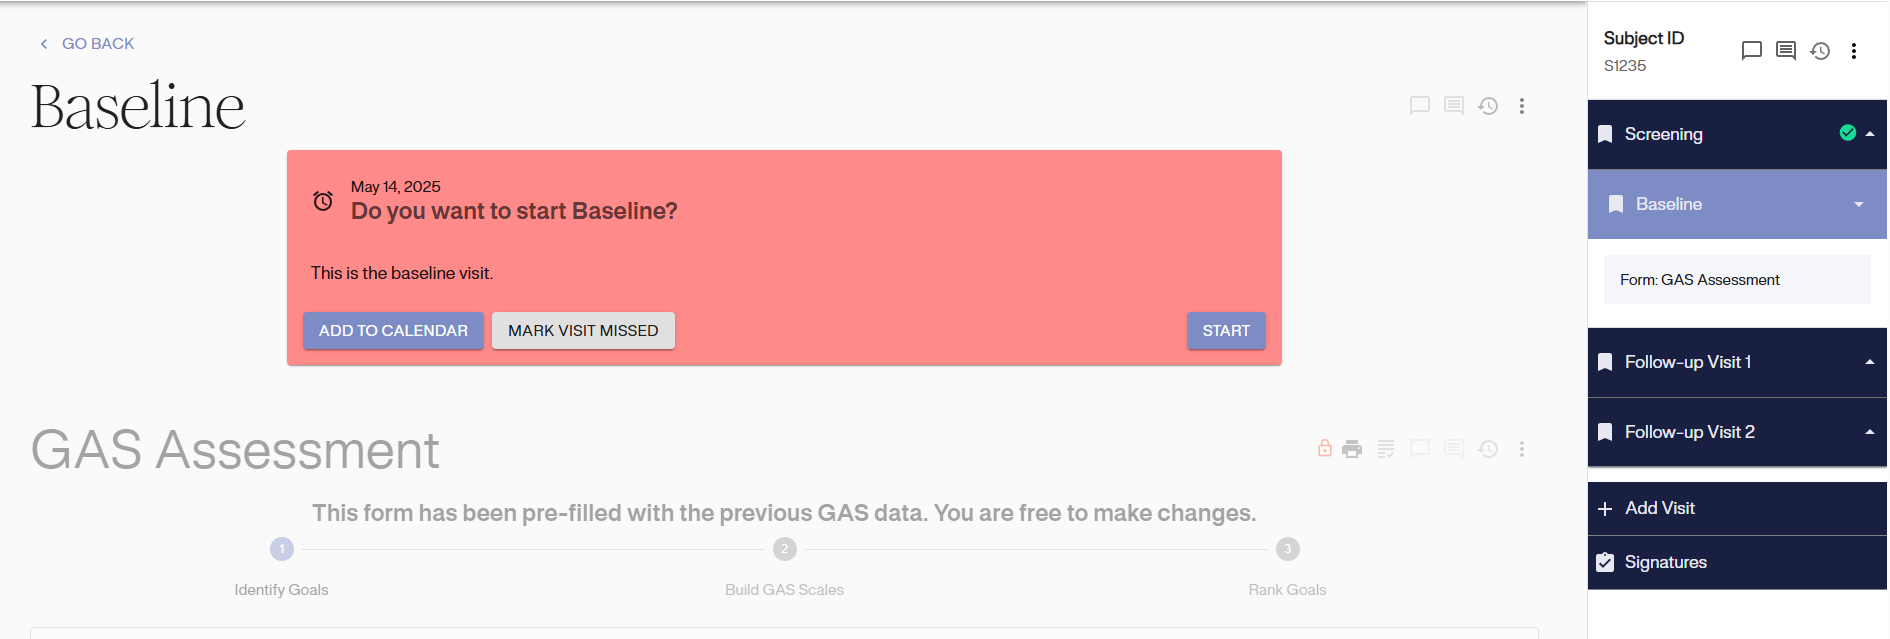
To start the Baseline visit, click on the start button on the visit details page.
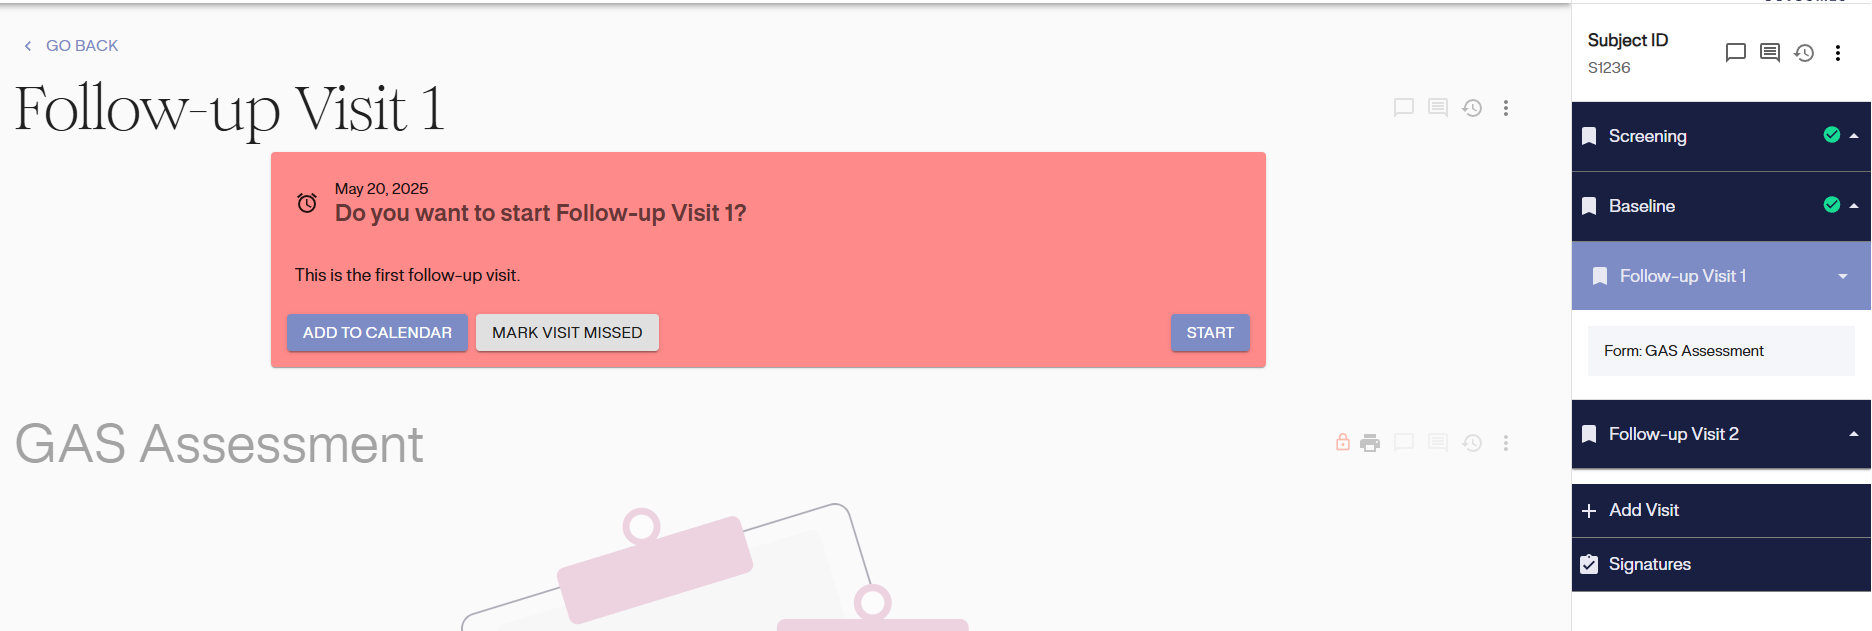
Follow-up Visits
To access the follow-up visit page, click on the appropriate follow-up visit. The names of these follow-up visits may vary per study therefore, your study menu may look different.
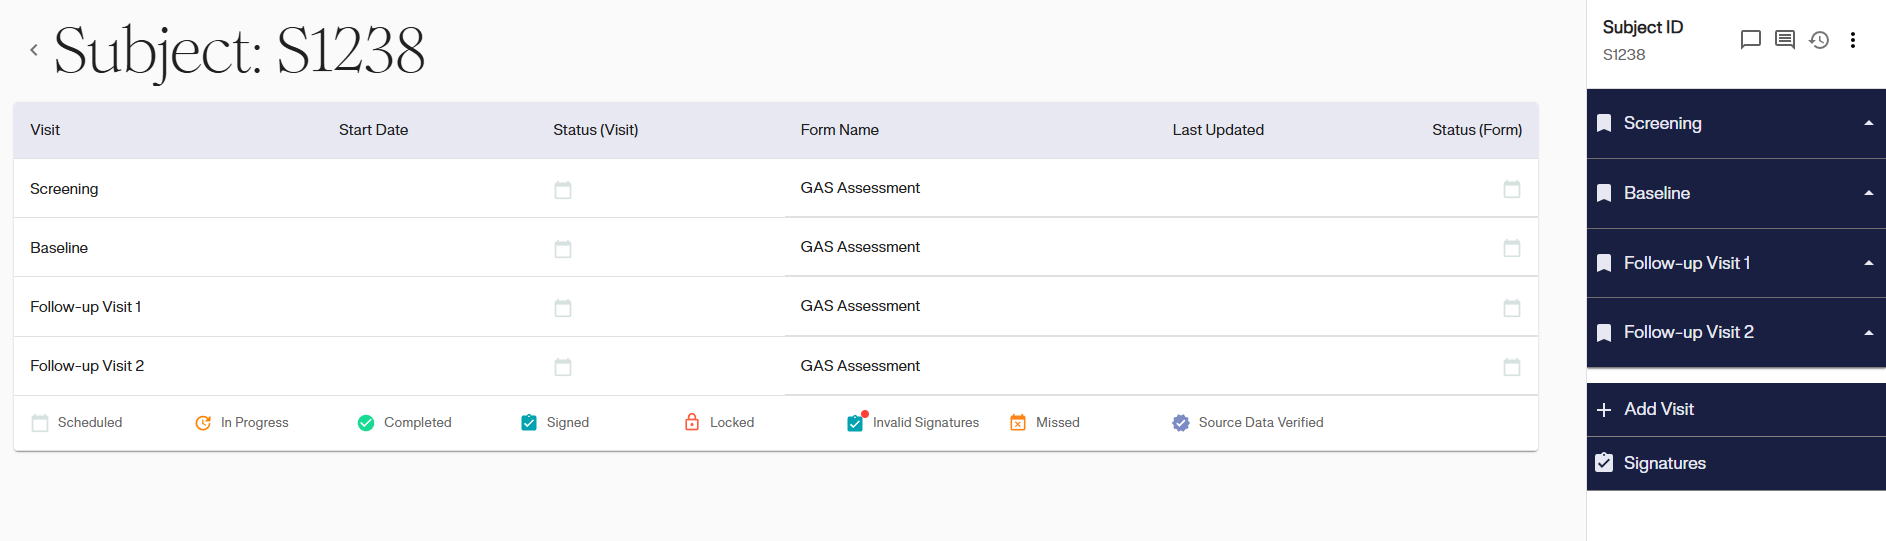
Unscheduled Visits
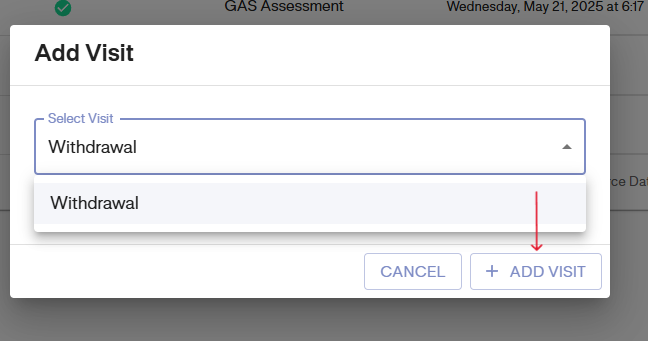
To add an unscheduled visit, click the 3-dot icon on the Subject Menu and select ‘Add visit’.
Then select the type of visit from the drop down and click on ‘ADD VISIT’.

Entering Data into Visit Forms
Data Collection visits
Depending on your study configuration, there may be different methods for completing the data collection forms and visits. In studies with separate Screening and Baseline Visits, the data should be entered during the Screening Visit, and the data entered will be pre-populated in the Baseline Visit. You have the option to adjust or modify this data during the Baseline Visit
For studies that combine the Screening and Baseline Visits into one visit “Screening/Baseline”, all data collection will take place during this initial visit.
Data collection for studies with Separate Screening and Baseline Visit
Screening Visit: GAS Assessment Form Data Entry
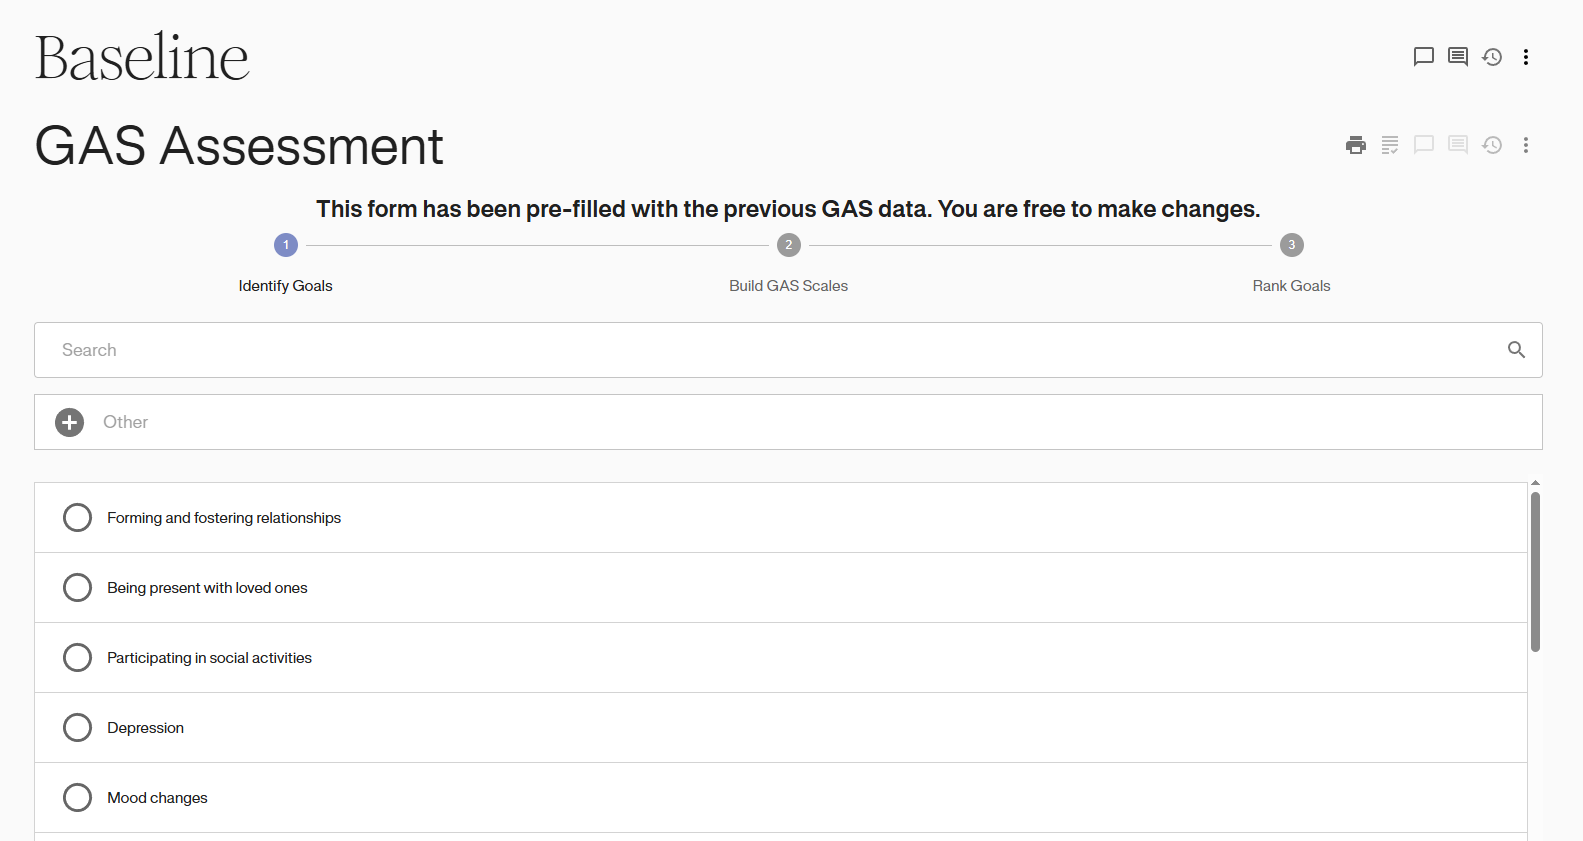
Identify Goals
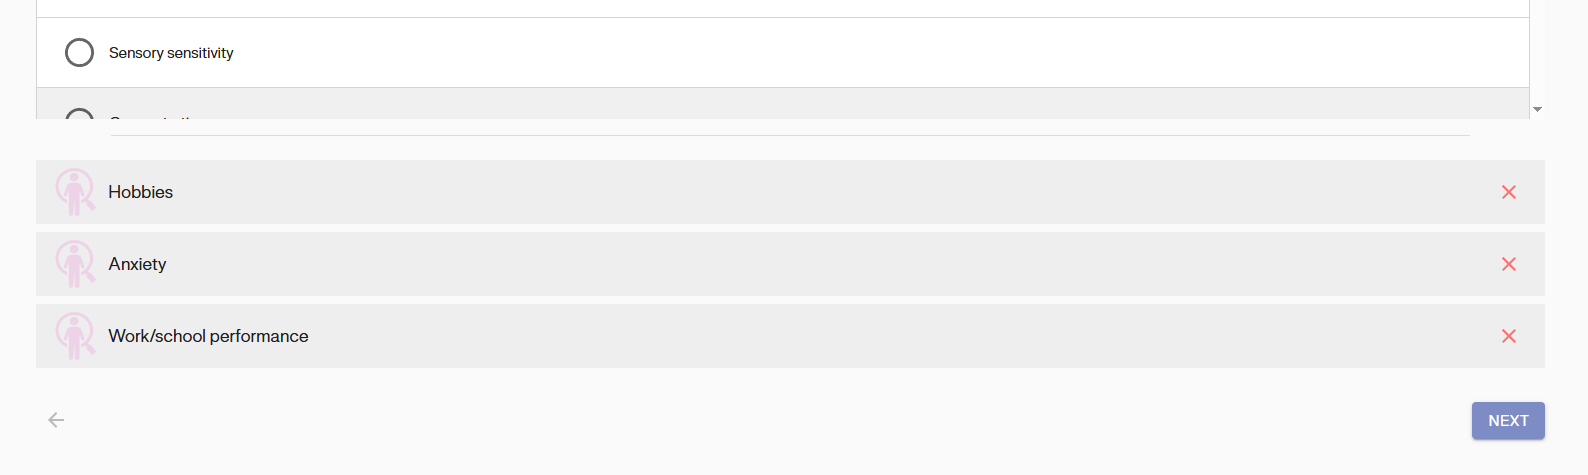
To enter data into the GAS assessment form for the screening visit, the first step is to identify the goals. Here, you can select goals from the goal inventory options or by using the search bar at the top to look for specific keywords. If you find that any identified goal is not present in the list, there is an option to choose “Other” and enter a custom goal.
Note: Not all studies include a goal inventory therefore you may only be required to add a custom goal.

Once the goals are identified, click on Next to move to next step.

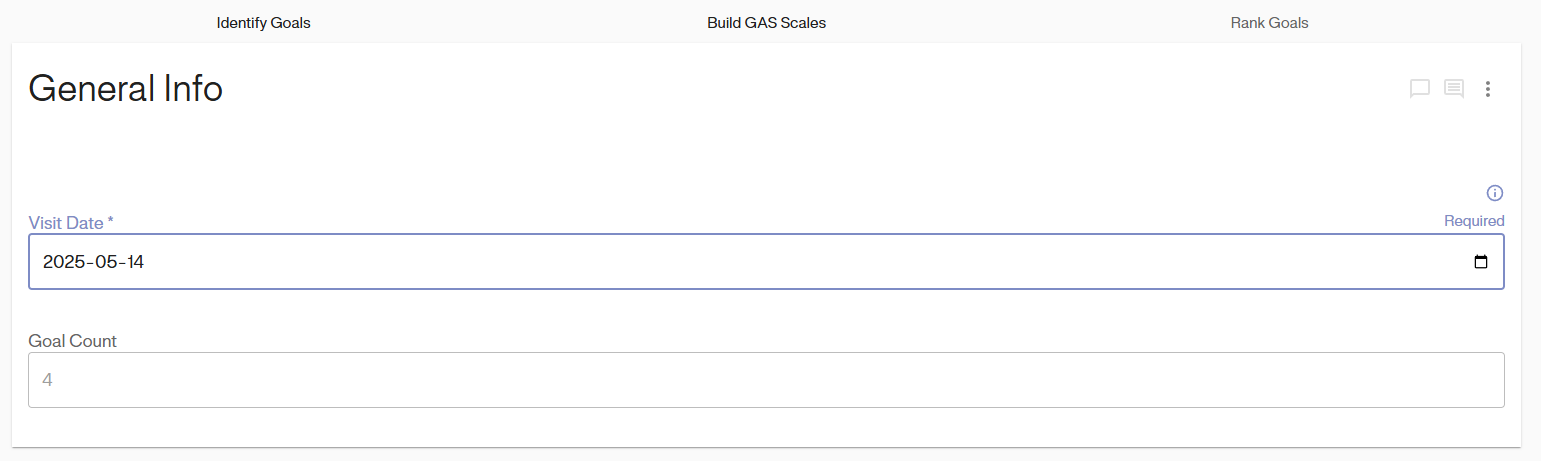
Build GAS Scales
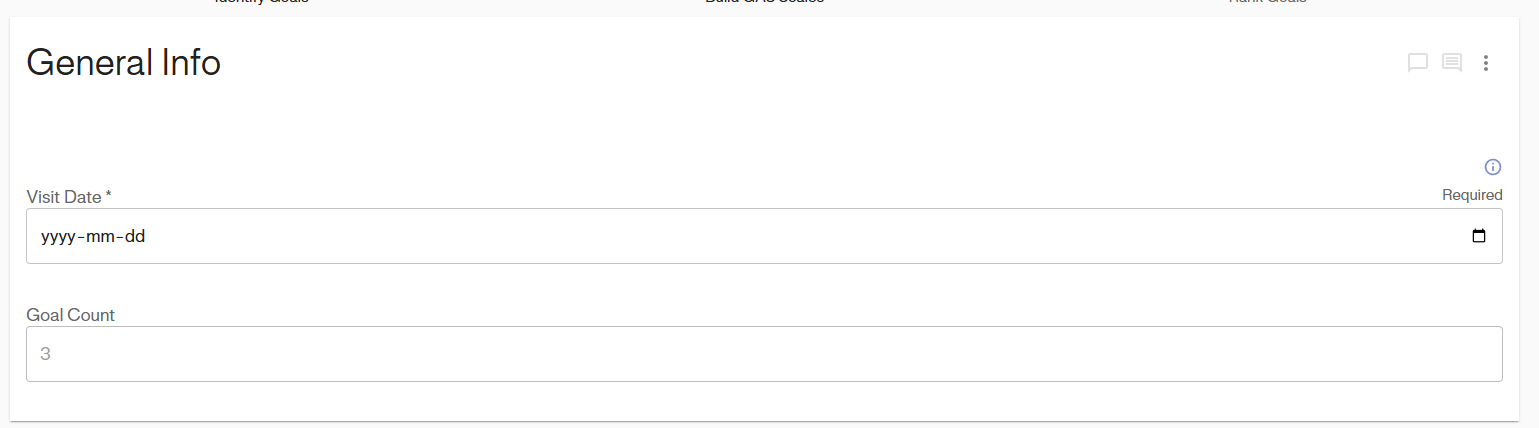
Enter the date of your visit by typing in the format (YYYY-MM-DD) or by selecting a date from the calendar icon located on the right side of the text field.
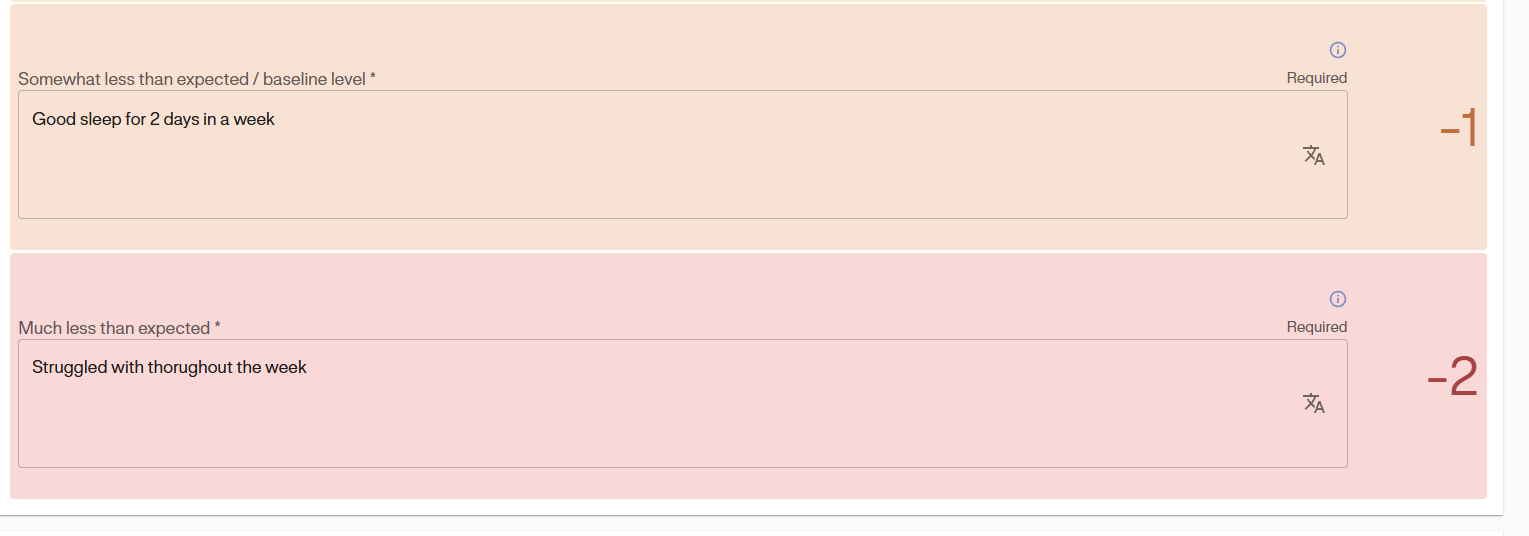
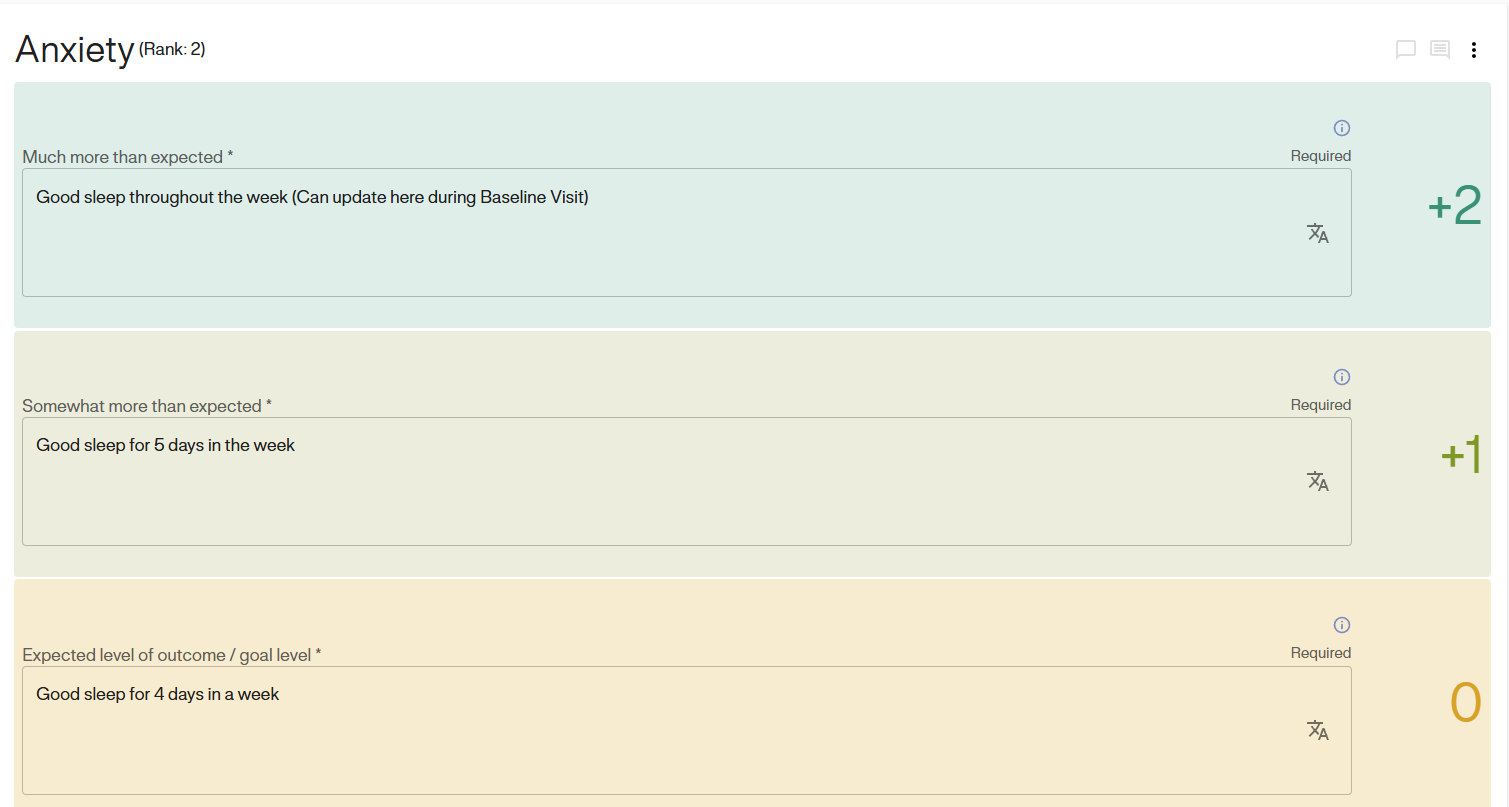
Next, enter the attainment level descriptions in the goal scale for each of the identified goals as shown in the image below. Repeat this process for all the goals selected.

Rank Goals (Optional - Study Dependent)
Finally, rank goals from most importance to least important. Some studies may include a skip rank option.
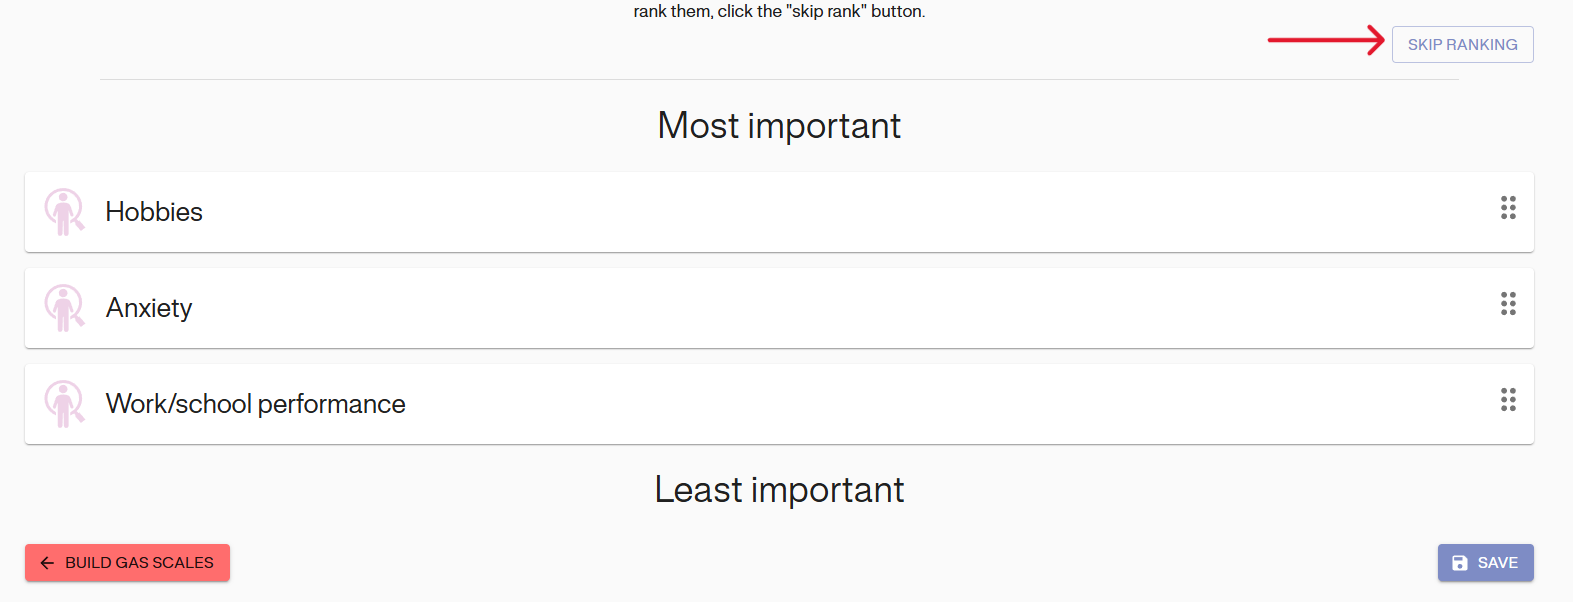
Enter the ranks by dragging and dropping each goal to sort them from Most Important (top) to Least Important (bottom).
If your study does not include ranking, the ranking section will not appear on your screen.
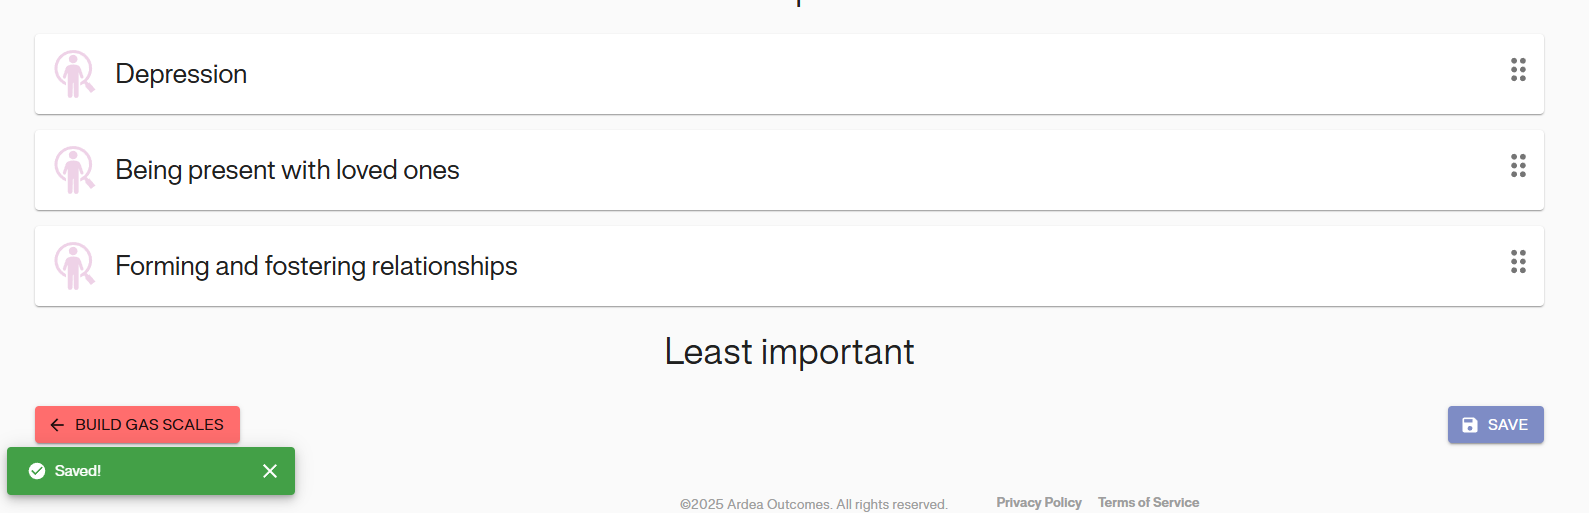
Save Form
Once you have correctly entered all of the data into the ‘Goal Attainment Scaling’ form, click the ‘Save’ button as shown below. Once the form has been saved, you will see the saved logo appear at the bottom of the screen (as show below):
If you have another form to fill out at the visit, navigate to the form in the study menu and follow the same instructions for entering data and saving the form.
Baseline Visit
To begin, navigate to the study menu and select the Baseline visit. Then, click on the Start Baseline form.
If your study includes separate Screening and Baseline visits, the GAS assessment form within the Baseline visit will automatically be filled with goals, goal scales, and rankings (if applicable) that were added during the Screening visit. During the Baseline visit, you have the option to add new goals, remove existing goals, or edit the descriptions for attainment levels of current goals. Moreover, all follow-up visits that include GAS forms will utilize the updated Goal Attainment rubric established during the Baseline visit.
Identify Goals
The Identify Goals section of the GAS assessment form for Baseline visit will have all the pre-populated values entered during the Screening Visit. If required, you may update the goals by adding or removing goals. Do not touch any goals you want to keep. Once you are finished, click on “Next” to continue.
Build GAS Scales
The next Section to complete is Section 2: Build GAS Scales. Here you will find all the prepopulated attainment levels for the goal scales set during the Screening Visit. However, the date of the baseline visit will not be pre-populated. Select the date of Baseline Visit.
First, scroll down to find the goal scales and the pre-filled attainment levels. Review these items, and if necessary, you can make modifications during the baseline visit as well. Ensure you complete the data entry for any newly added goals during this visit. Once you have finished all the goal scales, click “Next.”

Rank Goals
The ranks of the goals will be set to default order of selection or with the order in which it was ranked during the Screening visit. The ranks can be re-assigned at Baseline visit as well. Click on “Save” once the ranks of goals are satisfactory.
Data collection for studies with a combined Screening/ Baseline visit.
Studies with a combined screening/baseline visit will simply use the same visit and GAS assessment form to enter data for screening and baseline. To start the visit with a single goal-setting visit (Screening/ Baseline visit), click on the designated Screening/Baseline visit. Click on “START” to start the visit.
To complete the screening visit, follow the same instructions as outlined earlier. For the baseline visit, return to the “Screening/Baseline visit” and update the necessary details. Use the same instructions as before. You can add or remove goals, modify goal scales as needed, create new goal scales, and update rankings if applicable. Remember to click “Save” at the end of each data entry.
Note: The data collected in Baseline form and the text fields may appear differently based on the configuration of study.
Follow-up Visits
Using the study menu on the right side of your subject overview screen, navigate and select the appropriate follow-up visit.
All follow-up visits will follow the same format for entering data. Click ‘start’ to begin the visit.
Enter the date of Follow-up Visit.
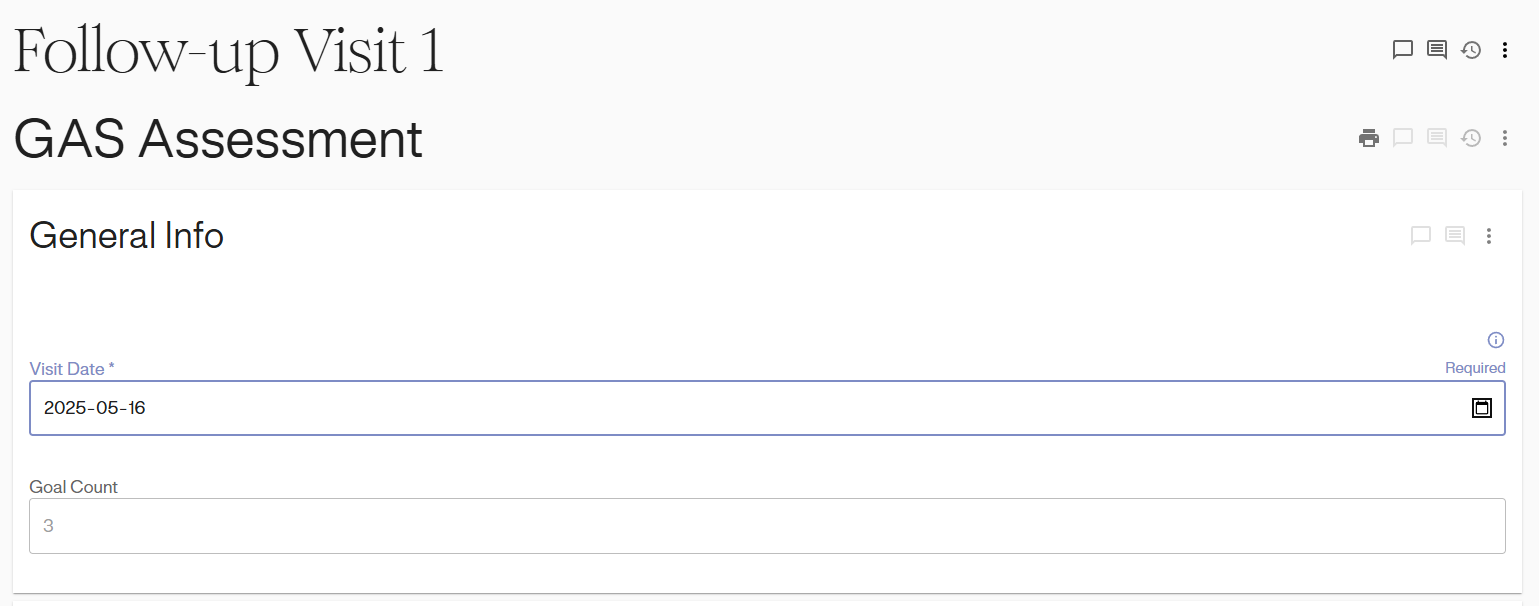
After you scroll down you will find the Goal Attainment Scaling Follow-up Form.
Enter Subject’s Current Status
A description of the subject’s current status in relation to each individual goal should be entered into the text box ‘Subject’s Current Status’ within the specific goal tab.Enter data in the subject’s own words as much as possible.

Subject and GAS Interviewer Rating
Then, rating needs to be selected by clicking on the radio button next to the appropriate goal attainment level. The type of ratings may vary per study (e.g. subject, participant, caregiver, GAS interviewer, etc.)
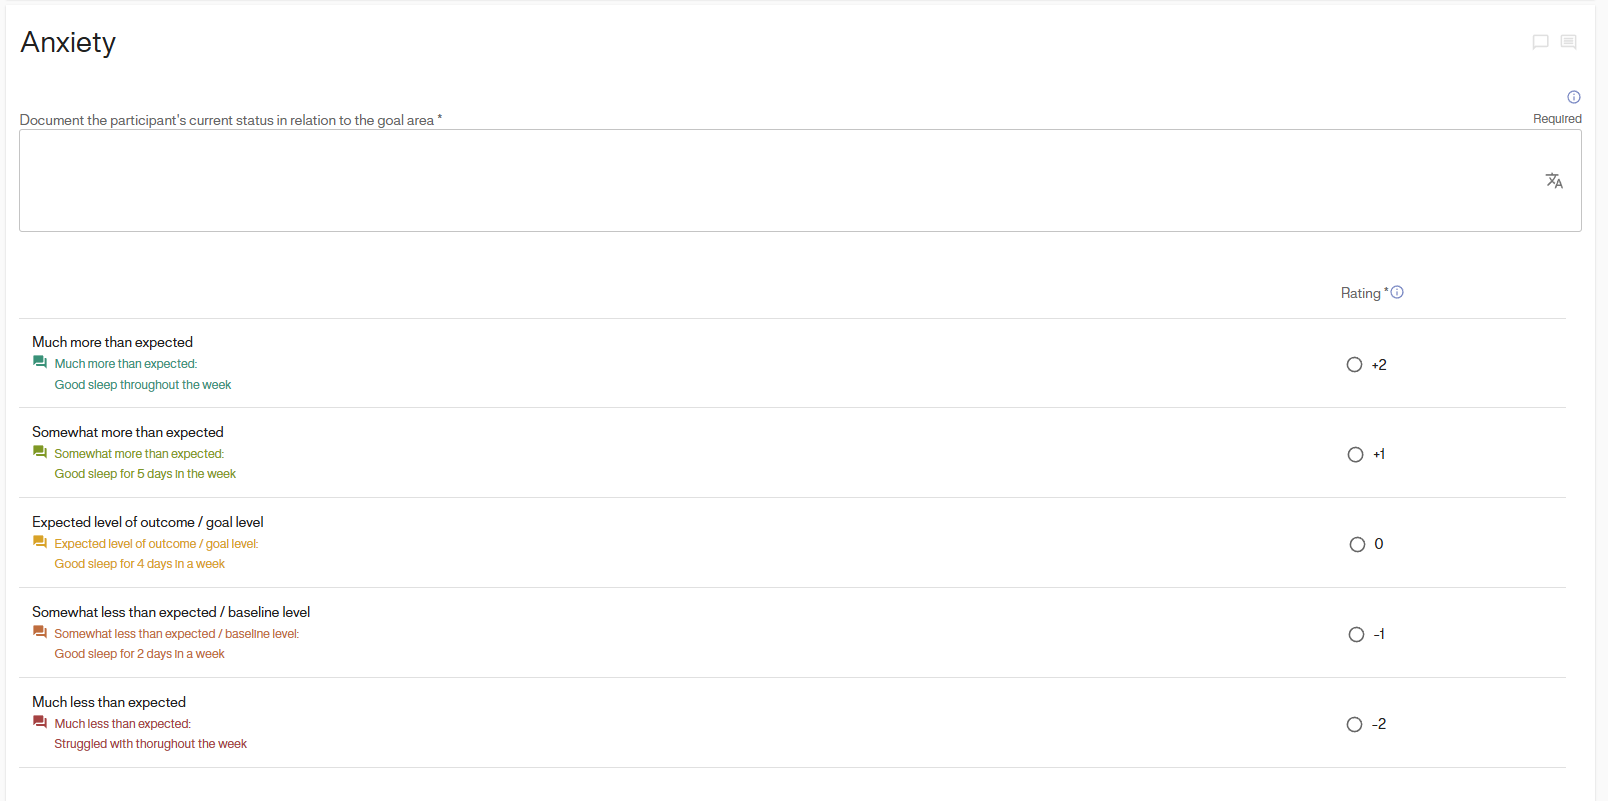
Each goal will be filled out in the same way. Please repeat these steps for each goal. The following pages show how to fill out a Goal Attainment Scaling Follow-up Visit Form.
GAS Interviewer Comments & Saving the Data
If applicable for your study, the GAS interviewer may include interviewer notes. Once all data has been entered for the follow-up visit, click “Save”. Remember to look for the green banner to ensure it has been saved.
