Data Locking and Unlocking
Data Locking is a security feature ensuring that verified data remains immutable. Locking can be performed at the Visit Level (granular) or the Subject Level (comprehensive).
Locking Permissions & Restrictions
Data locking may occur during your study depending on data management requirements. The locking of the data is primarily completed by the study’s data management teams and is not a feature for data entry personnel. If you have data entry access, you will see the lock option is unavailable.
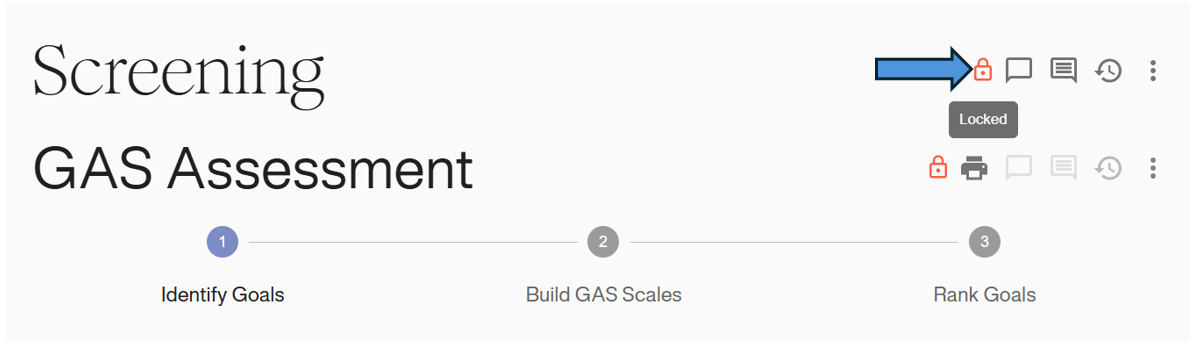
See example of unavailable locked visit option below:
It is important to note that once data has been locked (regardless of the level), a special request must be made to the GoalNav® support and/or data management team to unlock the data for a data entry personnel to make any changes unless the changes being made are in response to a query. This may be missing data from the visit or an error when entering data.
Whether data will be unlocked for site requested changes or not remains on a case-by-case basis. If the change you are making is in response to a query and the visit is locked, email your study specific email for support.
In general, you will note data locking occurs at the VISIT LEVEL. However, depending on the study, the form level or subject level may also get locked.
Visit Level Locking
Locking a visit prevents edits to all forms contained within that specific visit.
Locking a Visit
To perform this action, you must first navigate to the specific Subject and Visit record.
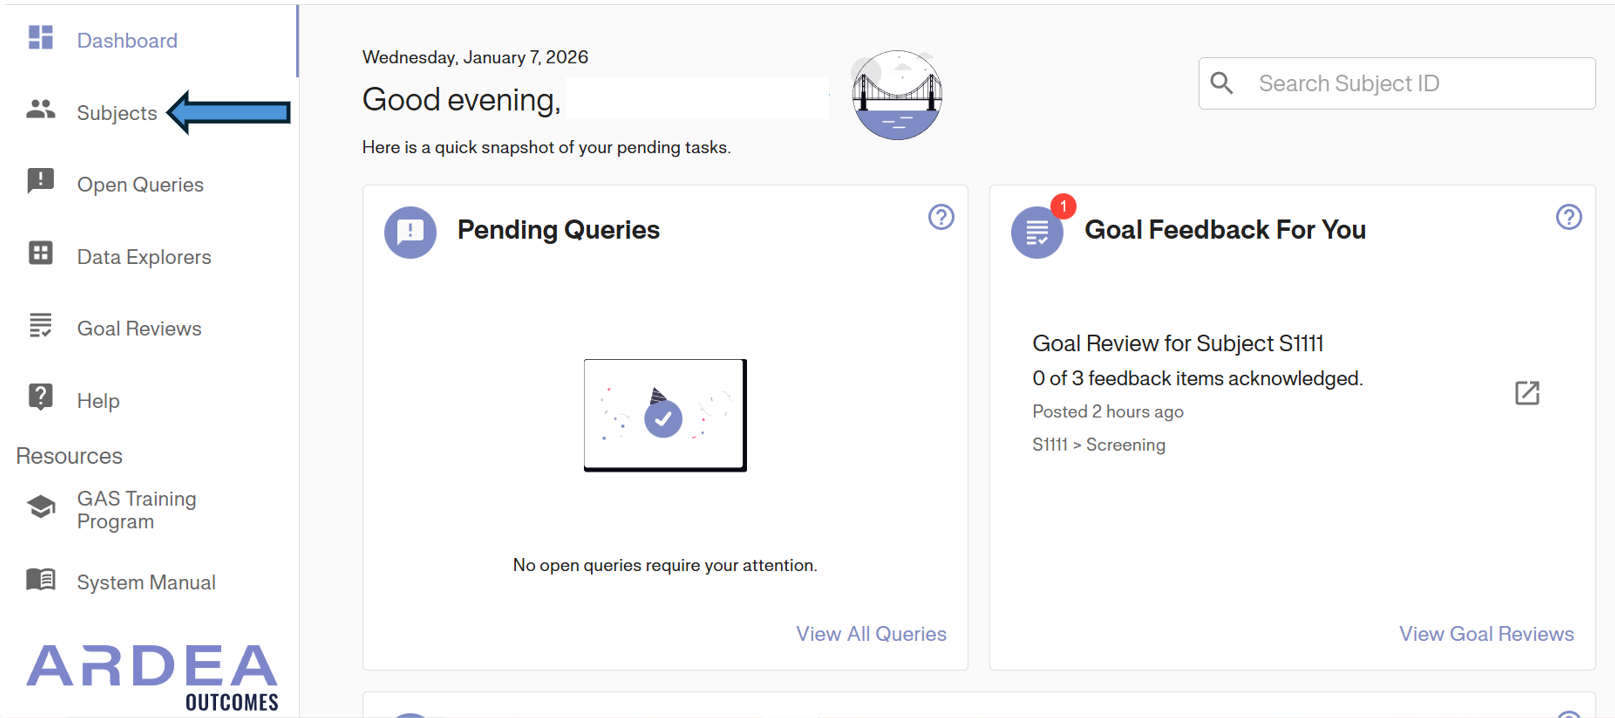
1. From the main Dashboard, click Subjects in the left-hand navigation menu.
2. In the Subject Matrix, locate the subject you wish to manage and click on their Subject ID.
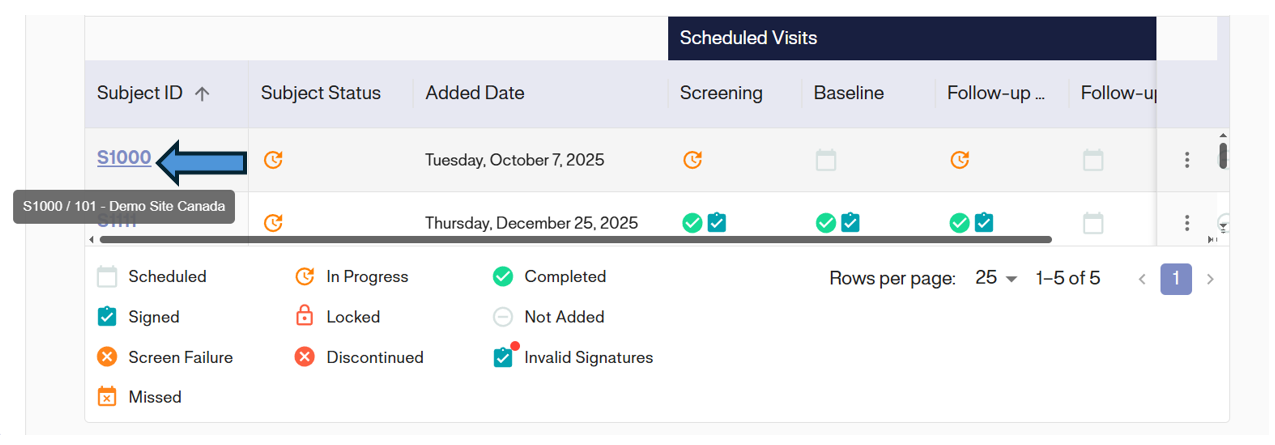
3. Inside the Subject record, select the desired Visit (e.g., Screening) from the left-hand sidebar.
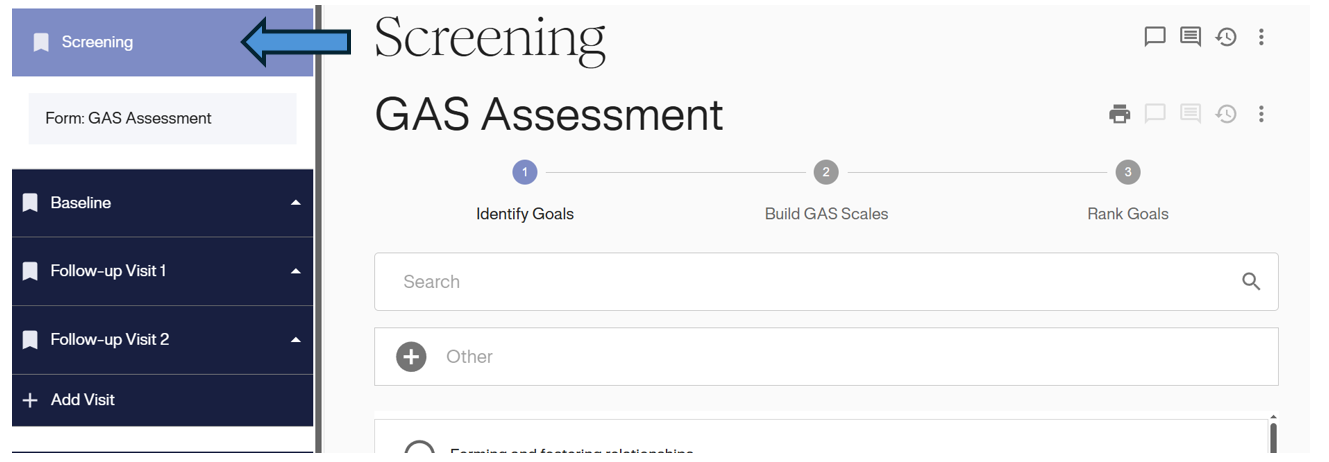
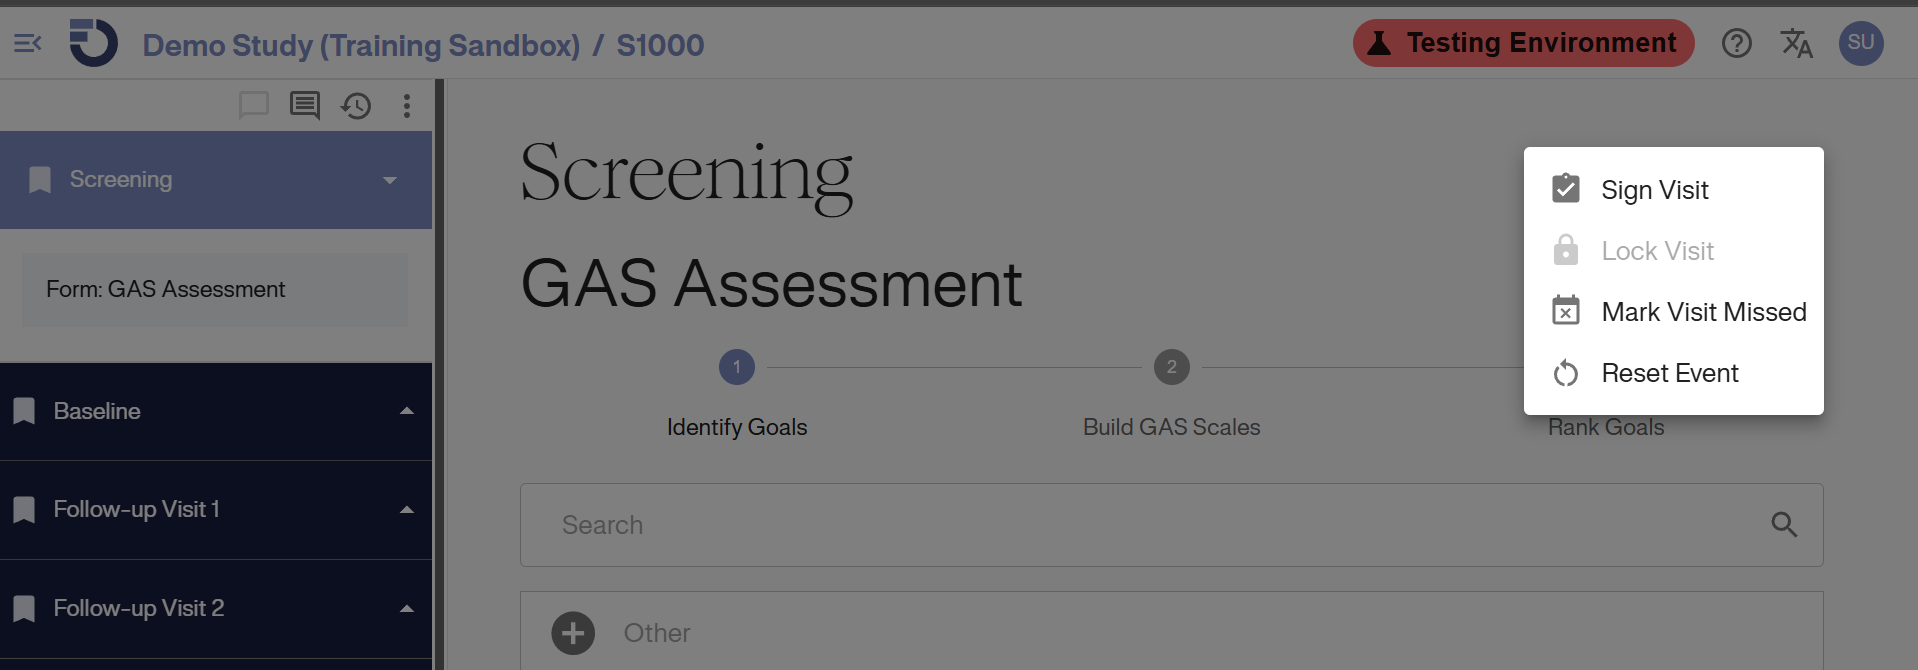
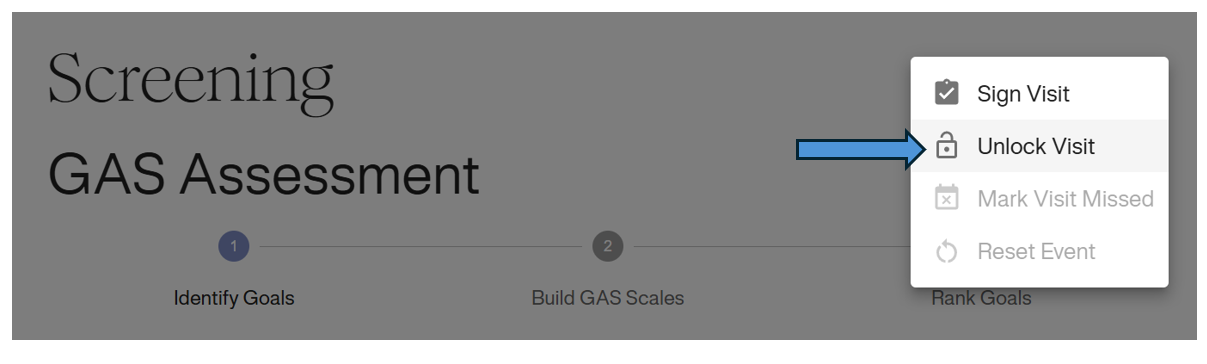
4. Click the Menu icon (three dots) located at the top right of the visit form view.
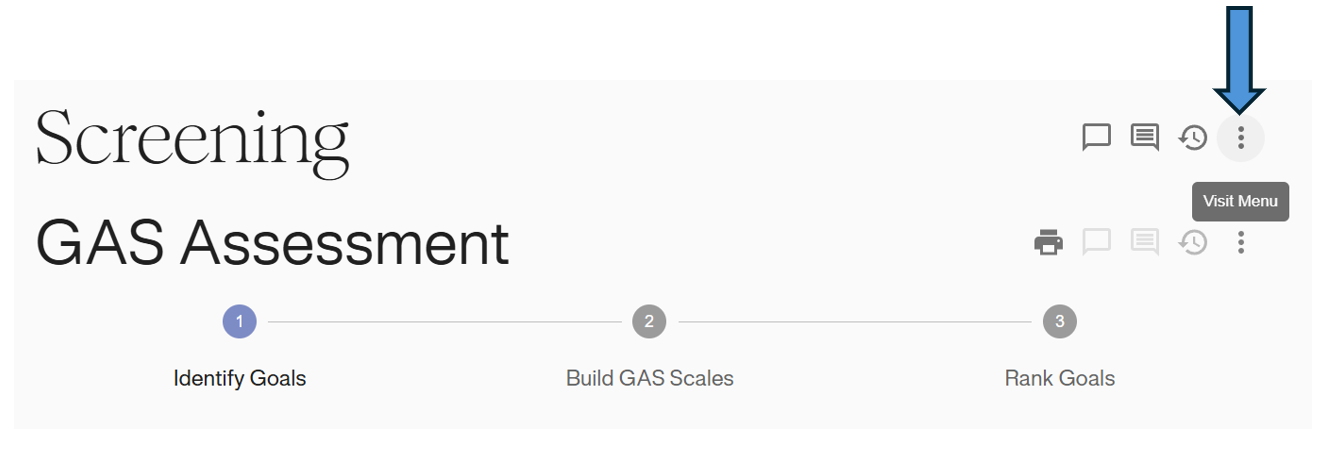
5. Select Lock Visit from the dropdown menu.
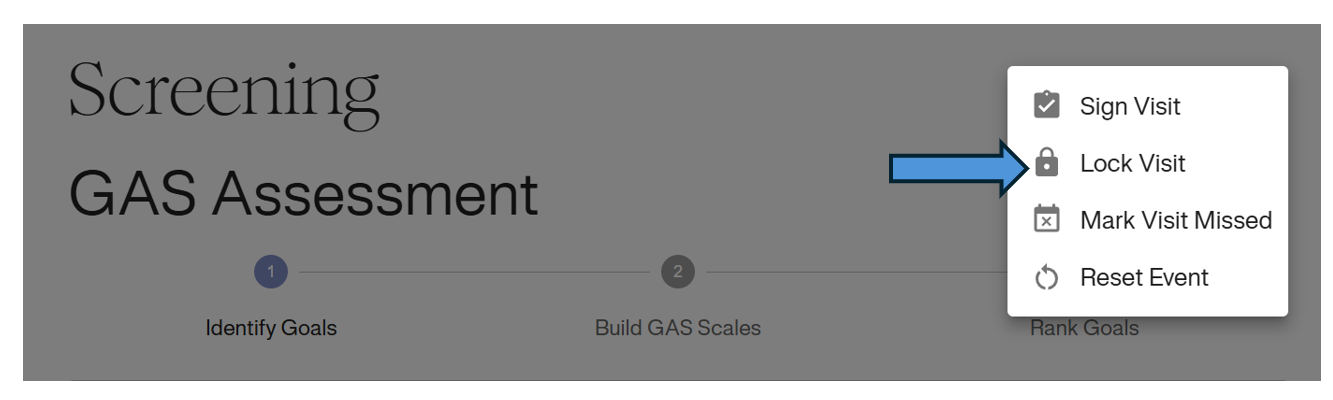
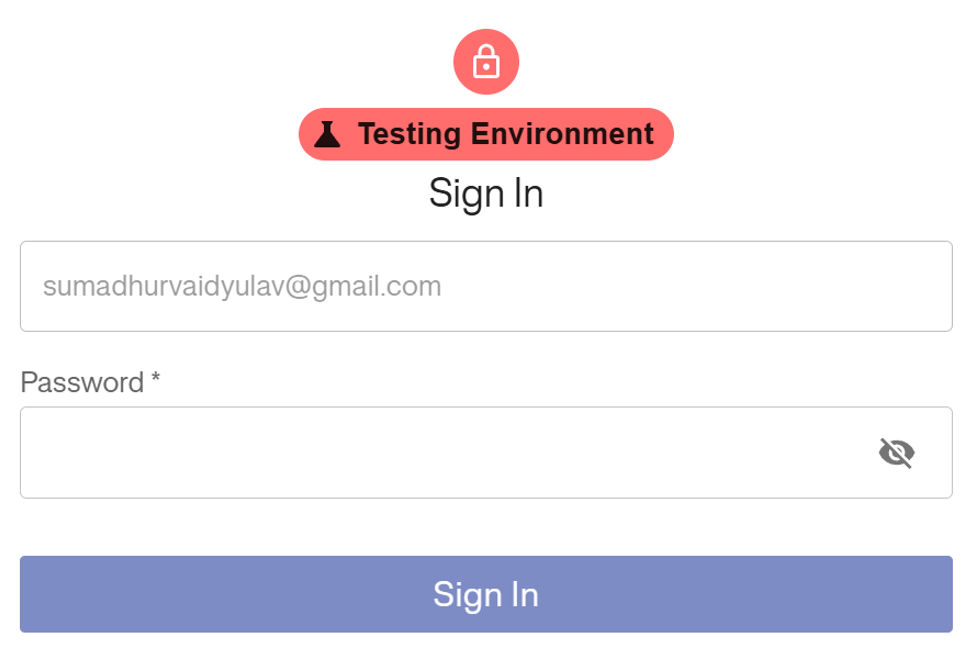
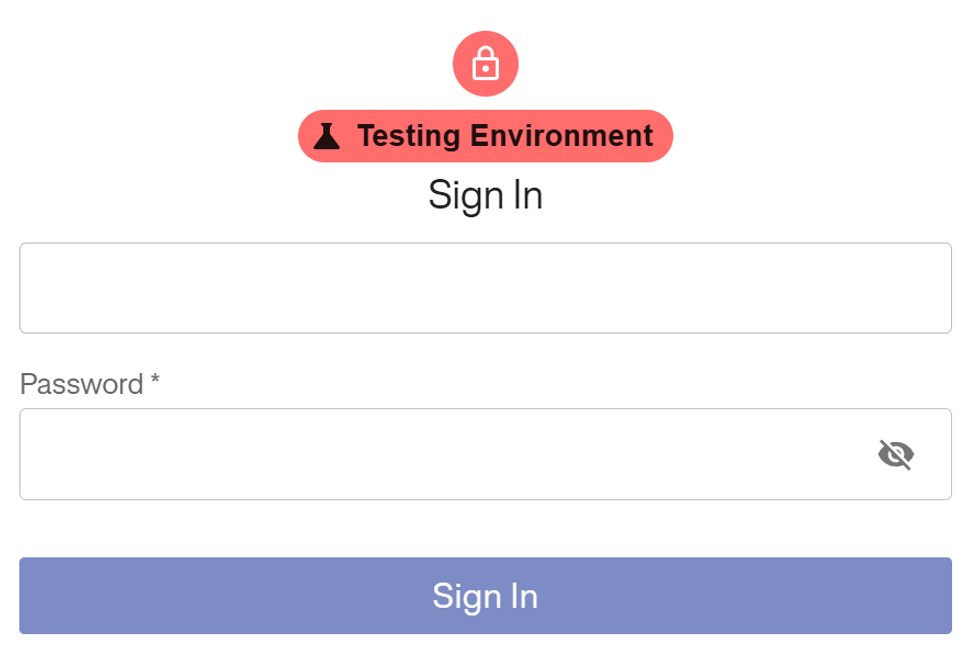
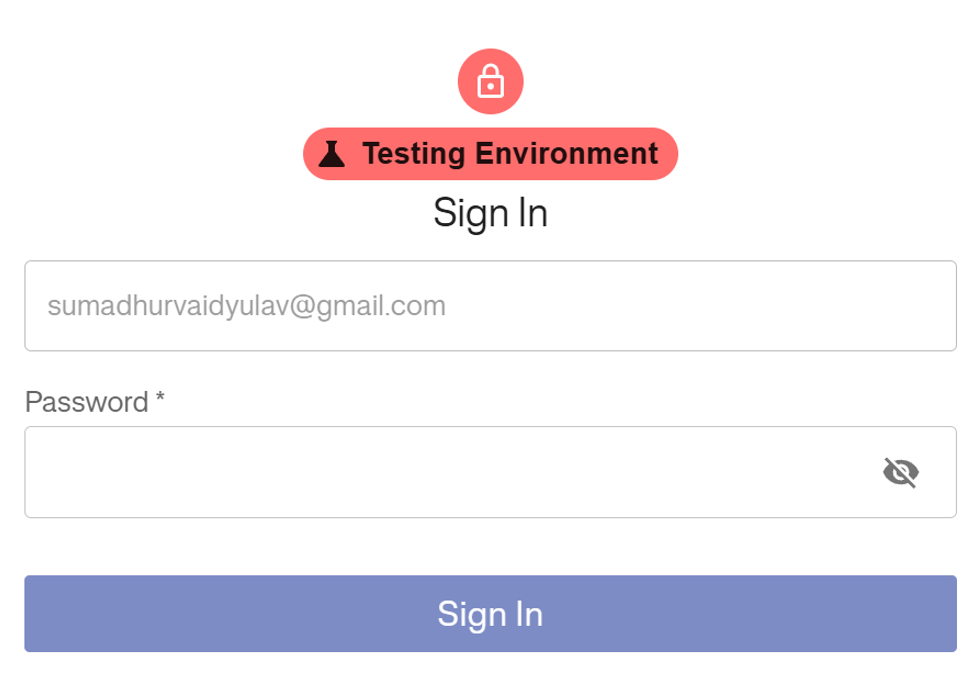
6. You will be prompted to Sign In to authenticate this action.
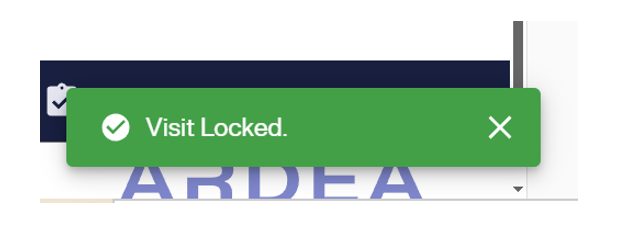
7. Upon success, a confirmation message will appear, and a Red Lock Icon will be displayed next to the visit name.
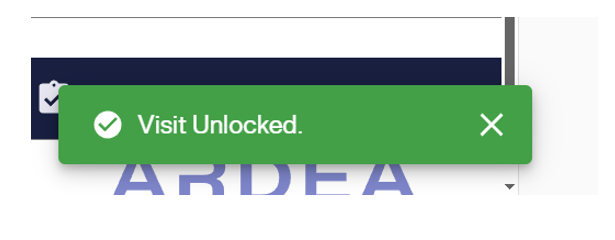
Unlocking a Visit
1. Open the same Visit Menu (three dots) on the locked visit.
2. Select Unlock Visit.
3. Authenticate your credentials when prompted.
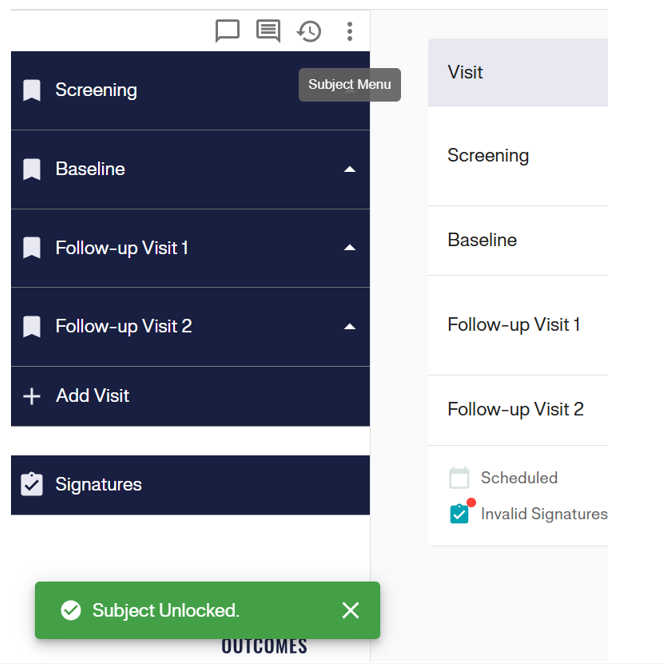
4. A green confirmation banner will verify the action, and the visit will return to an editable state.
Subject Level Locking
Locking a Subject is a global action for that patient. It automatically locks all visits and forms associated with that Subject.
Locking a Subject
1. From the Subject’s page, locate the Subject Menu (three dots) at the top of the left-hand sidebar (next to the Subject ID/Status icons).
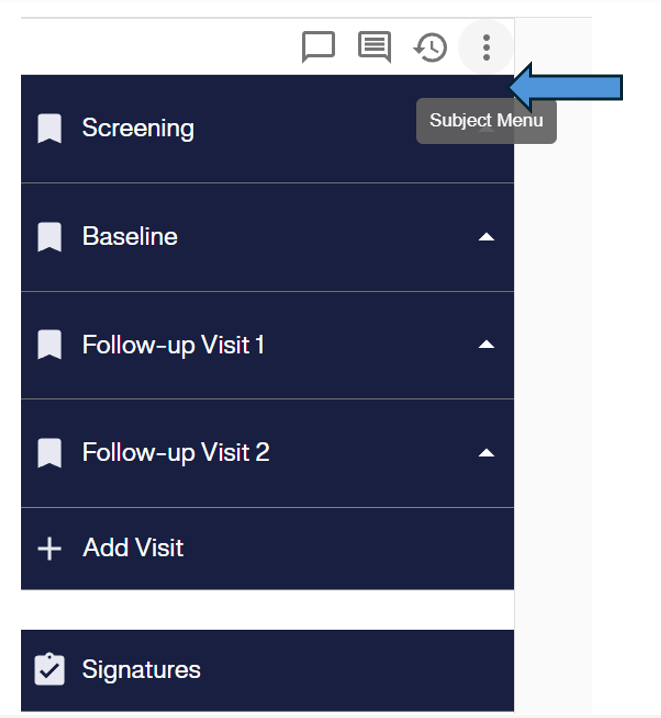
2. Select Lock Subject from the dropdown menu.
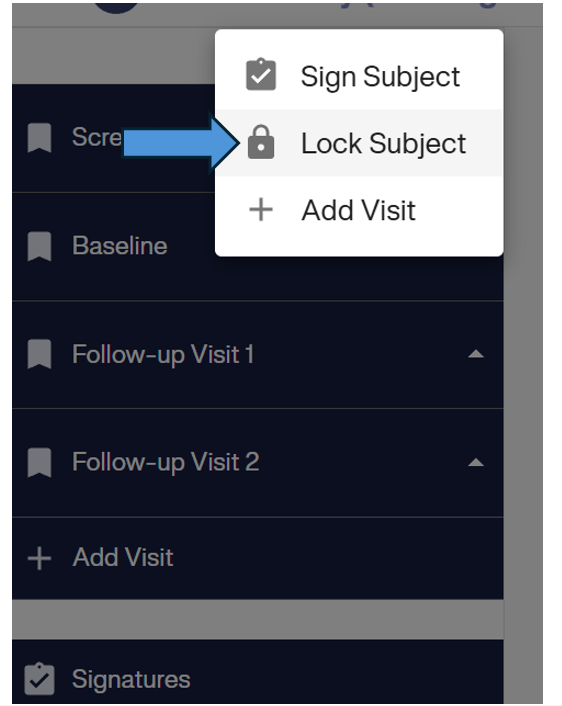
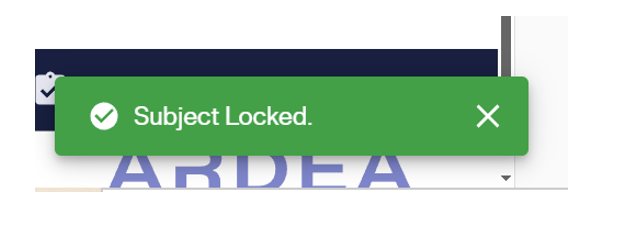
3. Enter your password in the authentication window to confirm.
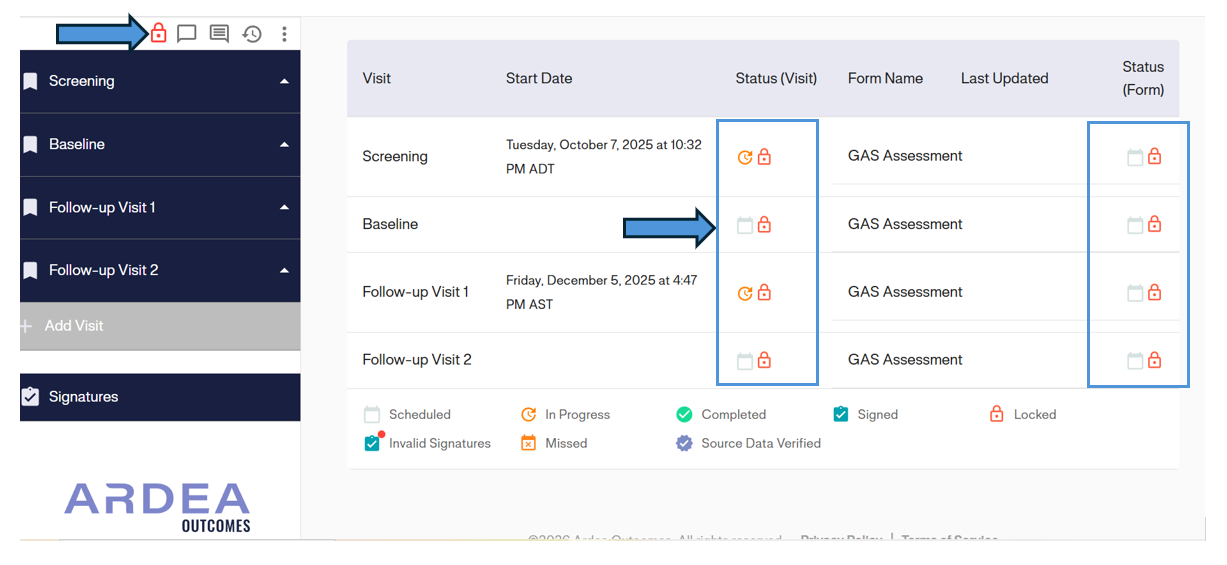
4. A notification will confirm “Subject Locked”, and the entire subject record is now read-only.
5. Note: As shown below, locking the Subject (indicated by the lock icon at the top left) automatically cascades this status to all visits and forms (indicated by the lock icons next to each visit and form).
Unlocking a Subject
1. Open the Subject Menu on the locked subject.
2. Select Unlock Subject.
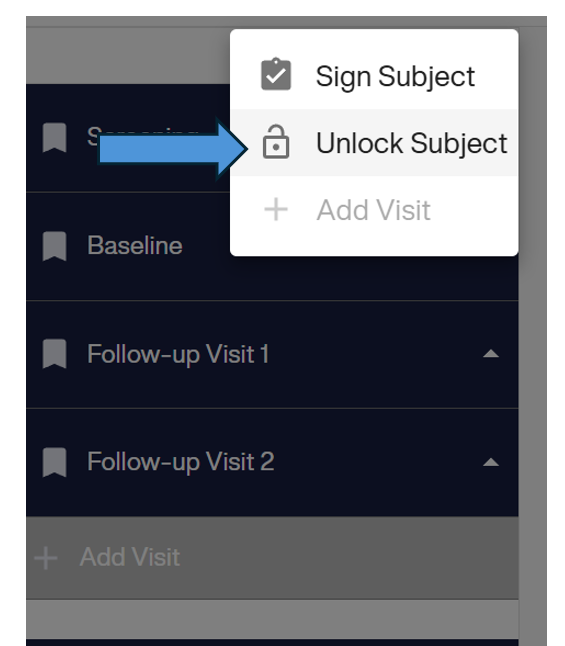
3. Authenticate your credentials.
4. The system will confirm “Subject Unlocked”, restoring edit access to the subject’s data.